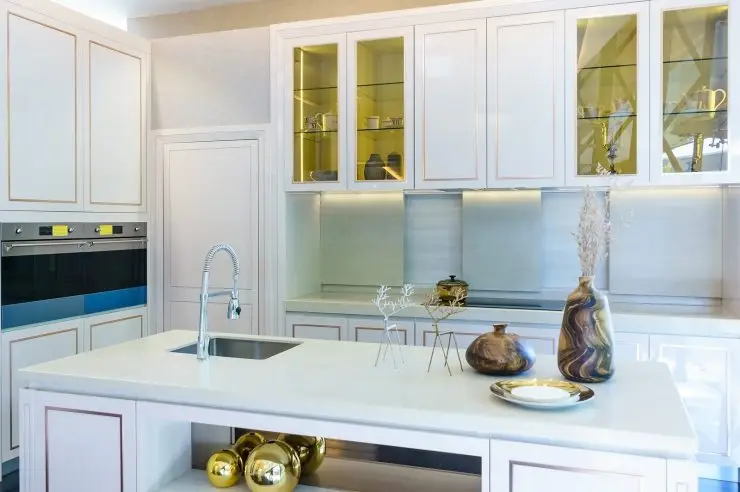
Looking for a way to display your favorite platters, bowls, and wine glasses? If your kitchen doesn't already have glass cabinet doors, try making your own! Adding glass inserts to just one set of cabinets can make a big impact on your kitchen. Here's a step-by-step guide for how to make DIY glass cabinet doors with a bit of craftiness.
How to Make Cabinet Doors with Glass Panels
If you want a see-through cabinet door, you have two options: real glass or Plexiglas. The results are similar, and Plexiglas may be more affordable, so check your local hardware store for options and price comparisons. Then, follow these steps on how to make cabinet doors with glass panels.
Remove the center panel
Take down your existing cabinet doors and tape them off with multi-surface painting tape. The straight light provides a guide for your jigsaw while protecting the finish. When applying the tape, be sure to leave a lip for the glass panel to rest on. Then, prepare the corners by drilling a few side-by-side holes with a small drill bit. The goal is to leave large enough holes for a jigsaw blade to fit through. Then, cut along all four sides with your jigsaw to remove the center panel. Sand the edges to smooth out rough spots. If you're also painting your cabinet doors, this is the time to do it!
Cut the glass
If you choose real glass, you'll need a professional to cut it to the proper size. If you're using Plexiglas, you can pay to have it cut at the hardware store before you purchase it, or you can cut it yourself using a Plexiglas cutting tool. Simply score the Plexiglas five to 10 times, line up the cut with the edge of a table, and snap it off.
Install the glass
Apply a bead of clear silicone (designed for glass if you are using real glass, or plastic if you opt for Plexiglas) to the front side of the cabinet door where the glass/Plexiglas will sit. Drop the clear panel in place, and allow it to dry for 10 to 15 minutes.
Add trim molding
To hide the raw edges of the glass panel, install trim molding that complements the contours of your cabinet doors. Buy enough trim for the front and back of the cabinet door to create clean lines whether the cabinet is open or shut. Cut the trim at a 45-degree angle so the pieces fit together like a picture frame. Prime and paint or stain the pieces to match the color of your cabinet doors. Once dry, apply a bead of silicone to the back of each trim piece and attach it to the front of the cabinet door. After letting it set for a few minutes, flip the cabinet door over and add the trim pieces to the back. Depending on the contours of the door, it may be best to turn the trim pieces over so the flat side faces outward.
Hang the DIY glass cabinet doors
It's time to install the finished product! Mount the doors on hinges, and you're all set.
Keep Your Glass Cabinet Doors Clean
For the best results, remember to clean your glass cabinet doors often. Glass cleaner and a paper towel should be all you need. For larger clean-glassing projects in your home, call Window Genie. We offer free estimates on window cleaning, power washing, and other services.